
Small Batch Sauerkraut

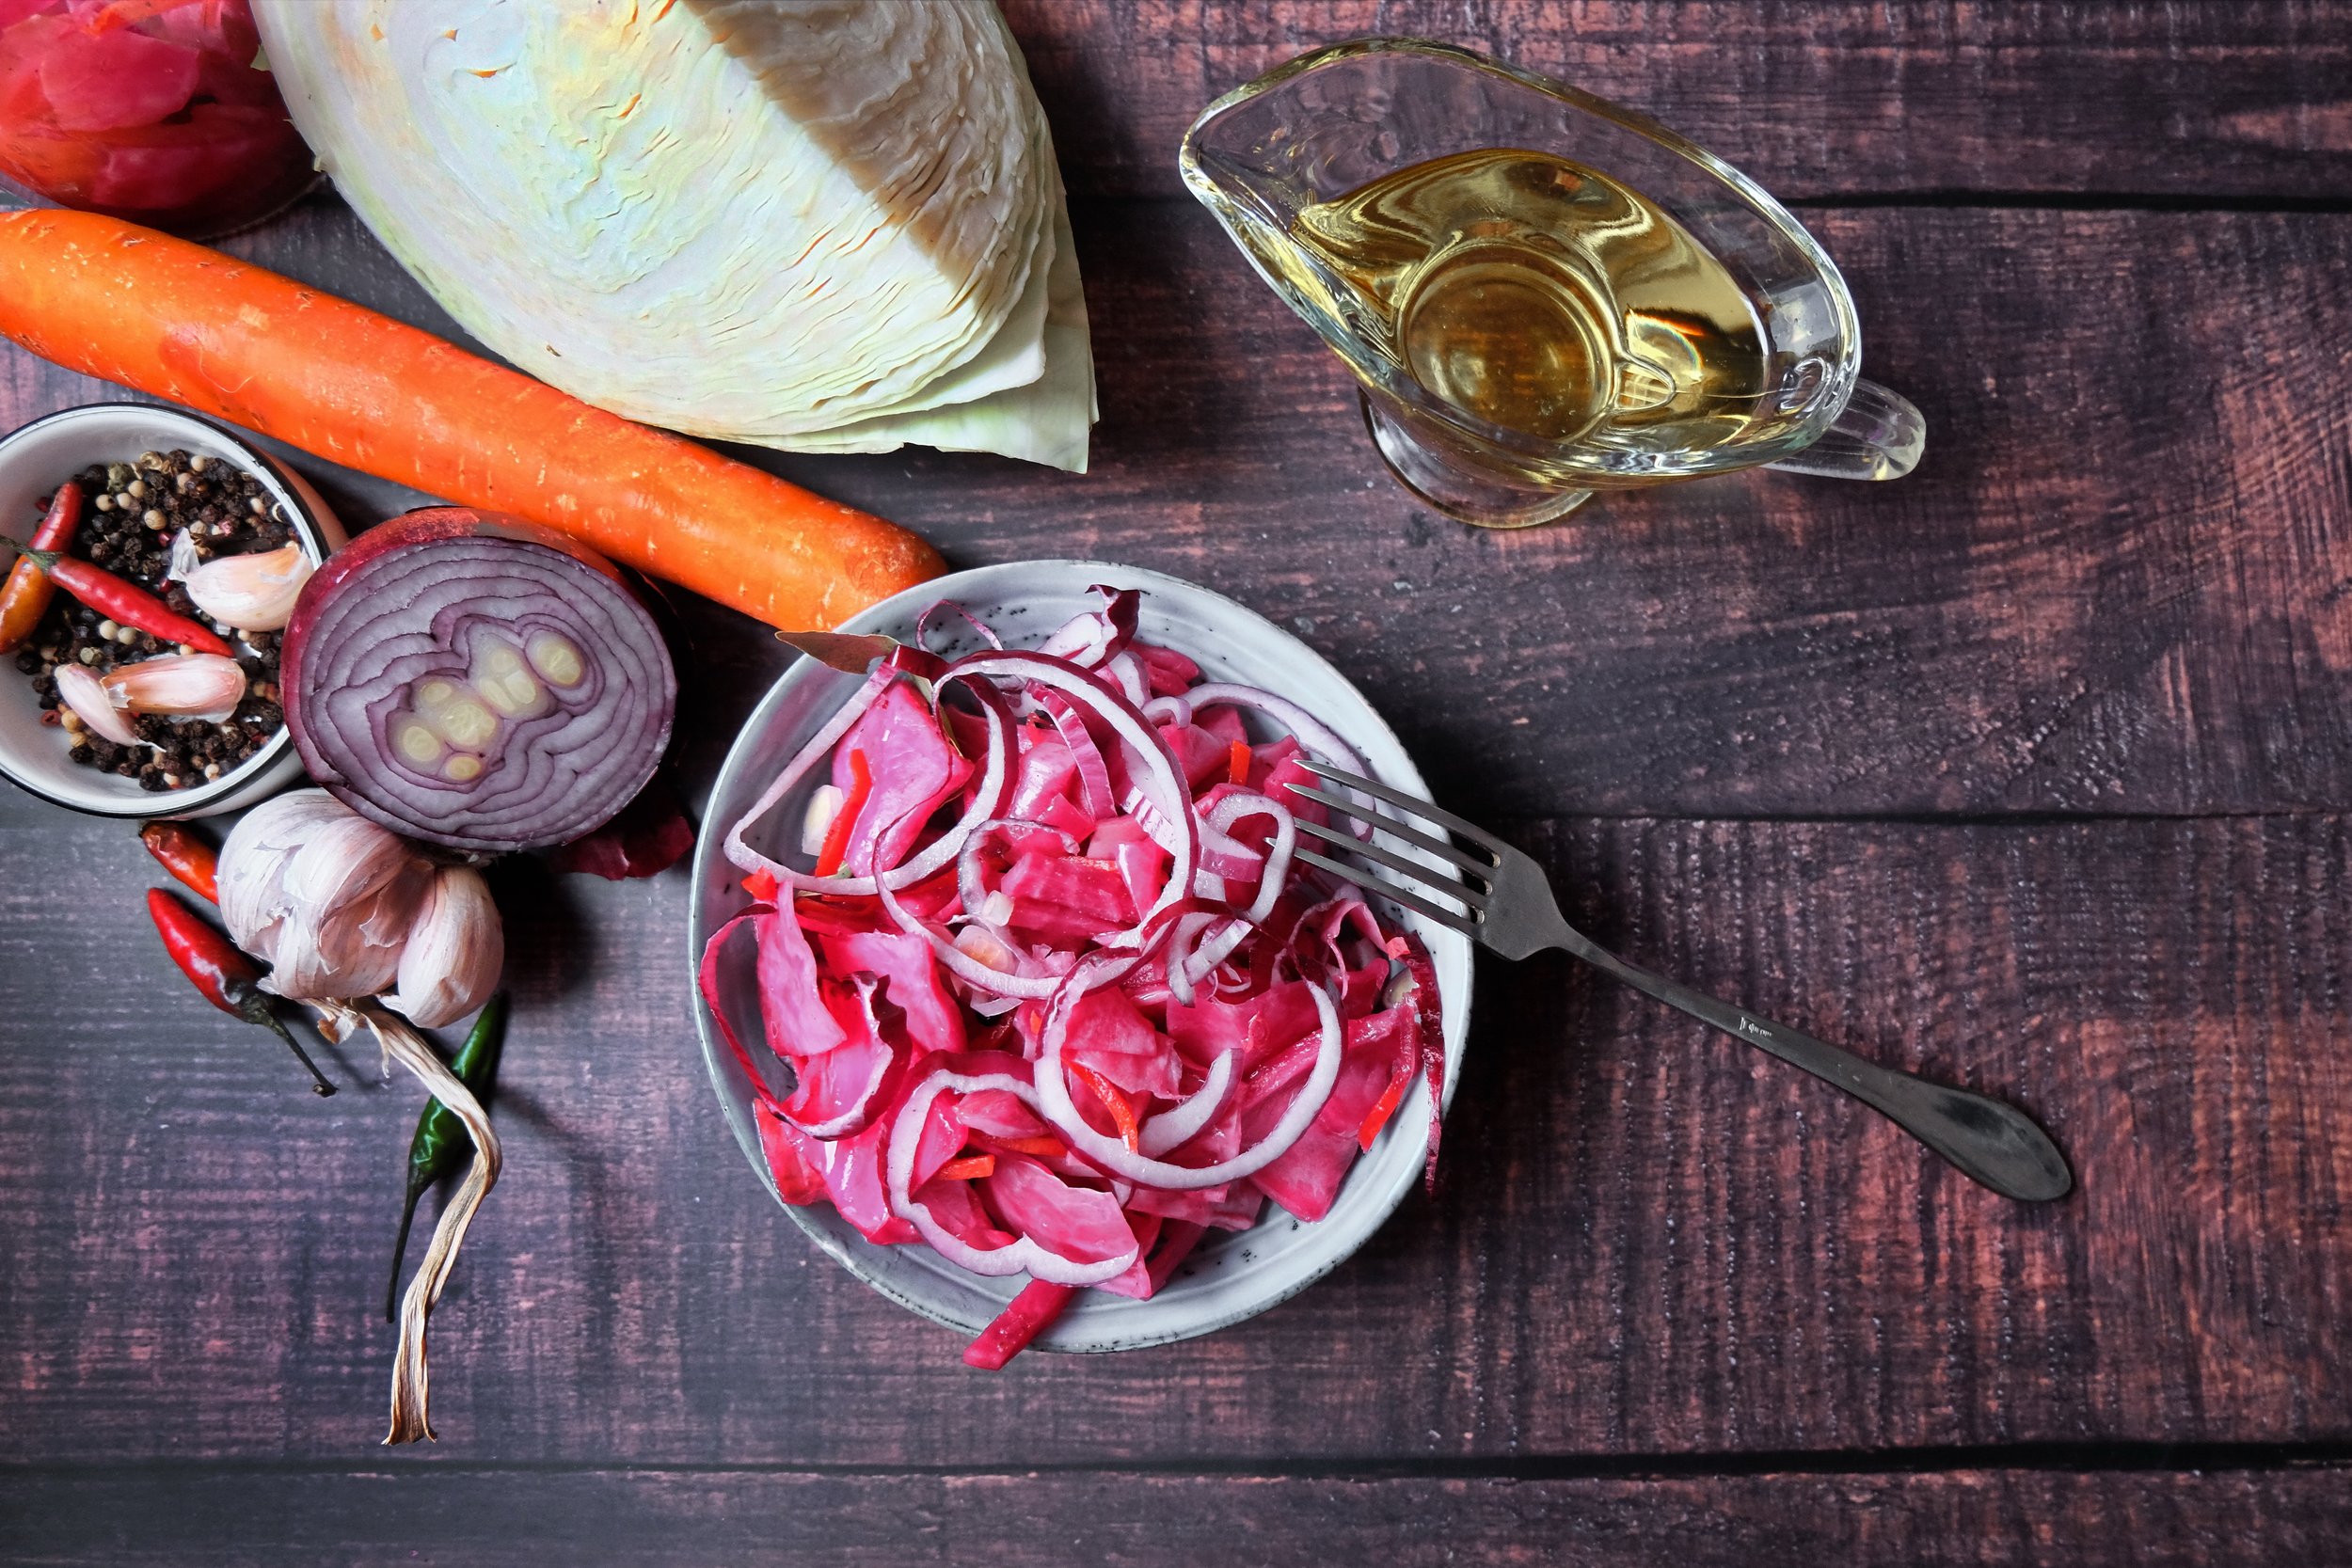
Recently, as a weekend project, I made a batch of Curtido. It’s a cabbage kraut that’s crunchy, sour and a delicious accompaniment to any Mexican meal.
Sauerkraut requires nothing more than vegetables, salt and a container. The process goes like this — we salt vegetables for 3 to 14 days between 55 to 68 F. In this environment, the lactic acid loving microorganisms already on the veggies proliferate. They go wild, eating the natural sugars in the produce and creating a pH between 4.2 to 4.5, which is the perfect sourness for our taste buds. The resulting kraut is delicious and good for our microbiome. It’s a win-win and humans have eaten lacto fermented foods since at least 6000 A.D.
Late Winter is a wonderful time to make small batches of all kinds of pickles, kimchi and krauts. It’s not quite gardening season, and messing about with kitchen science is fun.
I like to experiment. Ok truth, I love to experiment. My pantry and fridge are laboratories of concoctions in varying stages. Once, a few years ago, I made four separate root krauts — beets, parsnips, rutabagas and carrots. I’m not fond of rutabagas and souring them did not help, but the parsnips, beets and carrots were delicious.
Kraut Wisdom
Set Yourself Up for Success
New techniques are intimidating, so ease in and get comfortable by gathering what’s needed ahead, reading through the recipe and visualizing the process.
It’s Okay to Play and Take Creative Risks
But, do your research. Creativity thrives on book knowledge and hands-on experiences. All of your factoids will mull about and come in handy when you’re in the kitchen solving problems. Get into food science, be a nerd and love it. Fermentation is fascinating.
Begin Small and Stay Small
Do you need five gallons of kraut, or would a couple of quarts suffice? This is the hardest lesson to learn! I have kitchen bigitus and always overdo. I’m attempting to not exhaust myself, and instead enjoy the process.
Enjoy and Slow Down!
Red cabbages are gorgeous inside, and winter carrots are sweet. Don’t rush what’s important in life. A kitchen project is a tiny staycation, and an island of sanctuary amid rapidly moving time.
Read Up
“Fermented Vegetables” by Kirsten and Christopher Shockey is a fabulous reference book for recipes and techniques. They explain the art and science of kraut, brined pickles and kimchi. Best of all, they have delicious recipes for all kinds of vegetables from asparagus to zucchini.
“Under the Brine Feeling Fine,”
Remember this simple phrase to keep your ferments safe to eat. The good bacteria in the kraut don’t need oxygen, but many of the bad guys do. When the ferment is under brine, it lacks oxygen, so keep veggies well under the brine.
Safety Checklist
Lacto Fermentation is an age-old safe process, but it’s wise to follow basic kitchen practices: Follow your nose, eyes and common sense. Clean all work surfaces, tools and your hands with warm soapy water. Rinse vegetables in cool water without soap. Keep everything under the brine. During fermentation, put the jars where the temperature is a constant 55 to 75 F. Store cured ferments in the refrigerator. Don’t eat if it looks or smells rotten.
Red Cabbage Curtido
Makes 2 quarts and a little extra
Ingredients
1 red cabbage, about 4 pounds, cored and grated
4 medium carrots, grated
1 white onion, thinly sliced into slivers
3 cloves garlic, minced
2 teaspoons dried oregano, crumbled
2 teaspoons red chili flakes
2 teaspoons whole cumin, toasted and ground
2 tablespoons plus 1 teaspoon fine sea salt
Directions
Quarter and core the red cabbage, saving the tougher outer leaves. Using a food processor or by hand, grate the red cabbage and carrots.
Thinly slice the onion. A mandolin works well, and cut into slivers. Mince the garlic.
Toast the whole cumin in a skillet over a medium heat until fragrant. Grind the cumin in a spice grinder or coffee mill.
In a large non-reactive work bowl, mix the ingredients with your hands, working the salt into the cabbage.
Using a clean ½ gallon or two quart jars, pack handfuls of the kraut into a jar, using your fist, or a mashing tool to release the kraut’s juices.
Leave 2 inches of headroom at the top If you have kraut left over, then pack it into a smaller jar.
Tuck a cabbage leaf into the top of the jars. Fill a clean jelly jar with water, and put it on the cabbage leaf as a weight. The brine should rise to the top of the jar with all the kraut under the brine. Set the jars in a casserole dish, or bowl, because the brine will overflow as it cultures and ferments.
Leave at room temperature 55-70 F for about 3 days or until it looks bubbly and tastes sour.
When ready, remove the weights and cabbage leaves. It should taste slightly sour and not too salty. You can eat some now, but it needs to be refrigerated, and will continue to develop flavor as it ages. Try to keep the kraut submerged under the brine. If it gets mushy and smells bad, then throw it out. Otherwise, if it smells and tastes like kraut, then it’s good to eat. It will last up to a year in the fridge, but eating a little every day is a better idea.
Pickled Pub Eggs
Makes 6 -12 eggs
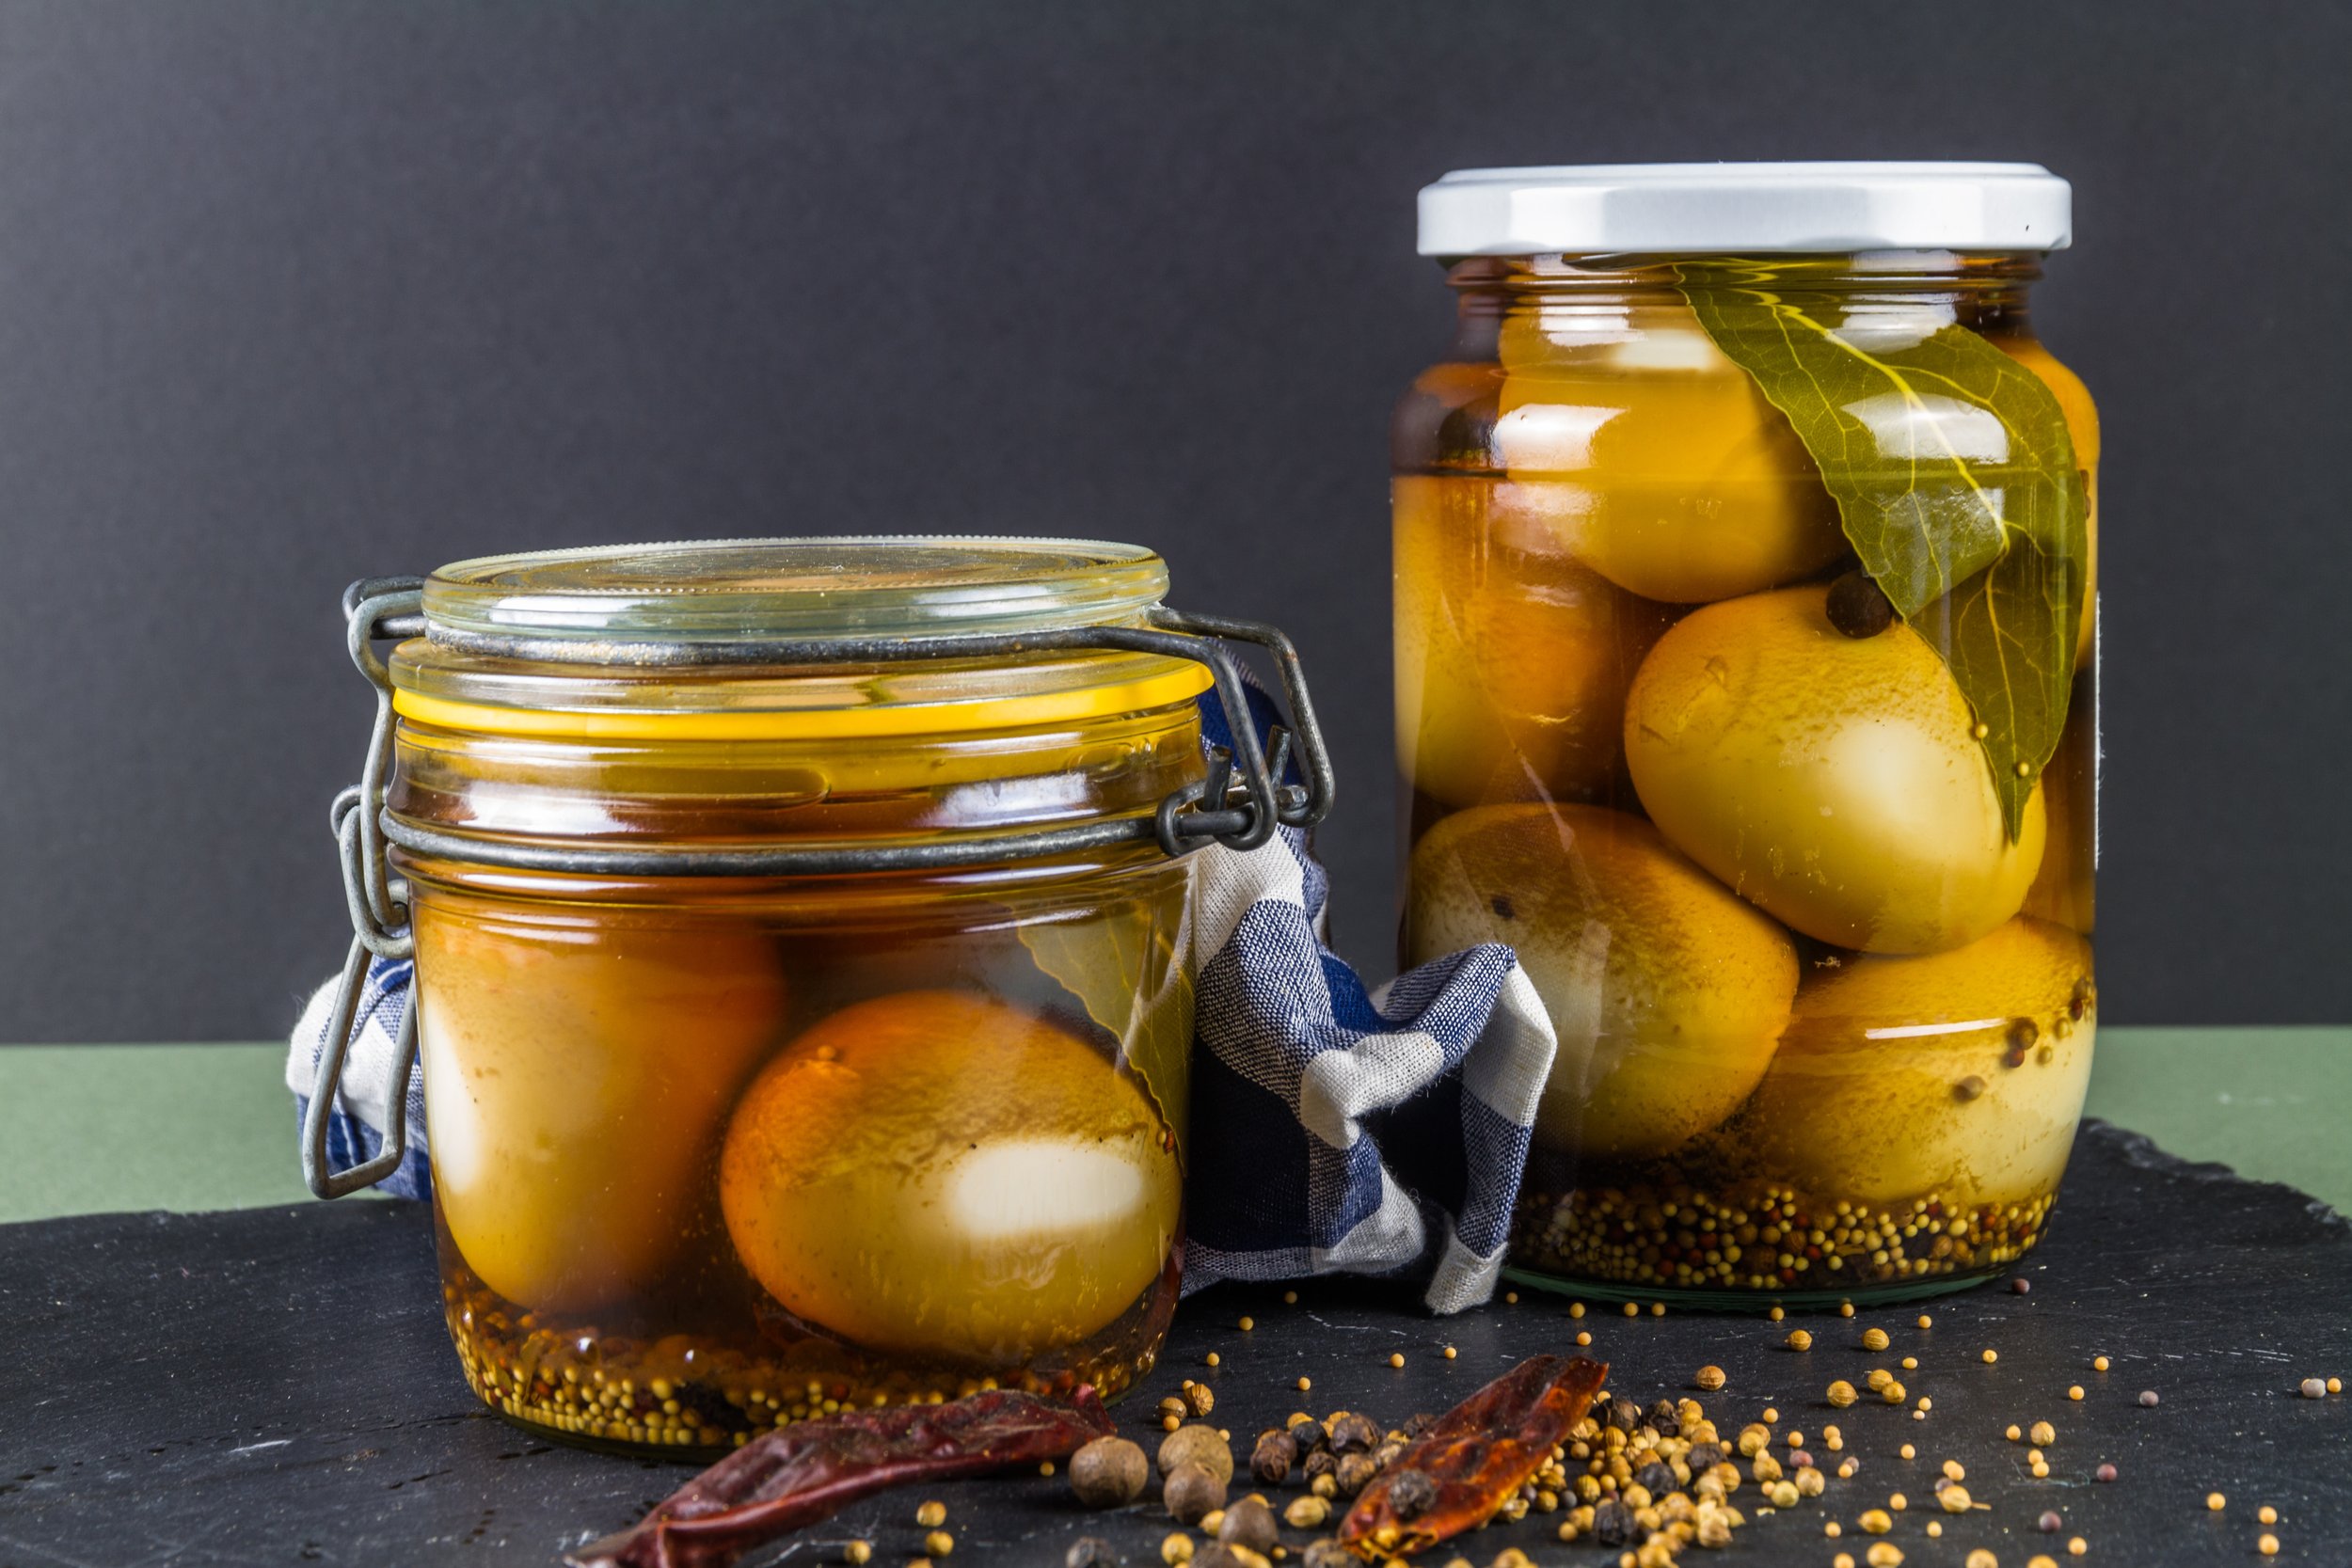
A tangy, spiced pickled egg? They are quite good and inspired by the 18th century practice of making pickles to preserve excess eggs. They’re quick pickles, not lacto fermented, so I recommend you refrigerate them. They need to pickle for at least 3 days, preferably a week before the flavors penetrate the eggs. Serve quartered. Perfect as a hors d’oeuvre, a picnic offering or with a cold beer and wonderful music.
Ingredients
6 poached eggs or up to 1 dozen
Brine
1 ½ cups hot water
½ cup apple cider vinegar
1 tablespoon + 1 teaspoon Maldon flake salt or coarse sea salt
Spices
5 cloves garlic smashed
4 slices fresh turmeric or ½ teaspoon turmeric powder
4 sprigs fresh thyme
1 teaspoon dill seed
4 allspice berries
¼ teaspoon red pepper flakes
¼ teaspoon white peppercorns
1 teaspoon caraway seed
1 teaspoon coriander seed
Make the brine by mixing the water, vinegar and salt together in a flat, lidded quart storage container. Add the spices to the brine. Submerge the poached eggs in the brine and refrigerate, allowing the eggs to pickle for at least three days; preferably a week before eating. Serve quartered.

Carrot and Cabbage Side Dish with Lime, Coconut and Cashews
Instant Pot
Serves 4
20 minutes
Flavorful vegetable side dish. The Instant Pot’s used to steam the veggies and then saute the toppings. Serve with rice and fried paneer.
Ingredients
Steamer Basket
2 medium carrots, cut into medium matchsticks
2 cups green cabbage, chopped
1 cup water
Saute
4 tablespoons ghee
1 tablespoon fresh ginger, minced
1 tablespoon fresh turmeric, minced
3 cloves garlic, minced
¼ teaspoon red chili flakes
½ teaspoon flaked sea salt
2 teaspoons coconut sugar
1 teaspoon black mustard seeds
½ cup large flaked dried coconut, unsweetened
½ cup raw cashews, roughly chopped
To serve
½ cup cilantro, chopped
Juice of one lime
Directions
Add cabbage and carrots to the IP steamer basket insert. Check that the sealing ring is in place, put the lid on and set the float valve to sealing. Set to high pressure for 1 minute with an instant release. If you like your vegetables softer, then set for 2 minutes. Once the pot comes to pressure, stay nearby, so you can release it at the correct time. Take the lid off, pull the basket out, and set the vegetables aside. No need for an ice bath.
Pour the water out and dry the inner pot. Set the IP to low saute. Add the ghee and warm; ginger and turmeric and saute them together for 2 minutes. Add garlic and continue to saute for another 2 minutes. The garlic should remain golden and never burn; add the red chili, mustard seeds and sugar and saute until the mustard seeds pop; add the cashews and coconut and saute until the coconut is golden, another 2 minutes.
Push, cancel and add the vegetables to the saute. Toss to coat everything. Salt to taste, add the lime and cilantro and serve.

Sweet Sour Red Cabbage Quick Pickle with Thyme
Makes about 1 quart
15 minutes prep. plus 1 hour of resting time
Lemony and sweet but not too salty. This pickled cabbage is good on its own or try it in a fish sandwich or as a topping for a green salad, especially in winter.
Ingredients
5 cups red cabbage, about one small head, finely shredded
1 tablespoon plus 1 teaspoon coarse sea salt
2 tablespoons runny raw honey
3 tablespoons fresh lemon juice
2 tablespoons apple cider vinegar
1 clove garlic, smashed and finely minced
2 teaspoons fresh thyme leaves, finely minced
½ teaspoon red pepper powder (or flakes)
Directions
In a large mixing bowl, sprinkle the salt over the cabbage and massage it in for 1 minute.
Rinse the cabbage, and drain in a colander to remove most of the salt. Add honey, lemon, apple cider vinegar, thyme, and red pepper powder. Toss together and taste. It should taste tart, sweet and a little salty. Add more lemon juice by the teaspoon, and pinches of salt if needed. Cover and refrigerate for at least 1 hour. It will keep for days but will soften dramatically after 3 hours. Serve cold or at room temperature.
Variation
Add ¼ cup purple basil and take out the thyme. Or, add ¼ cup Italian basil and 1 teaspoon of anise seed
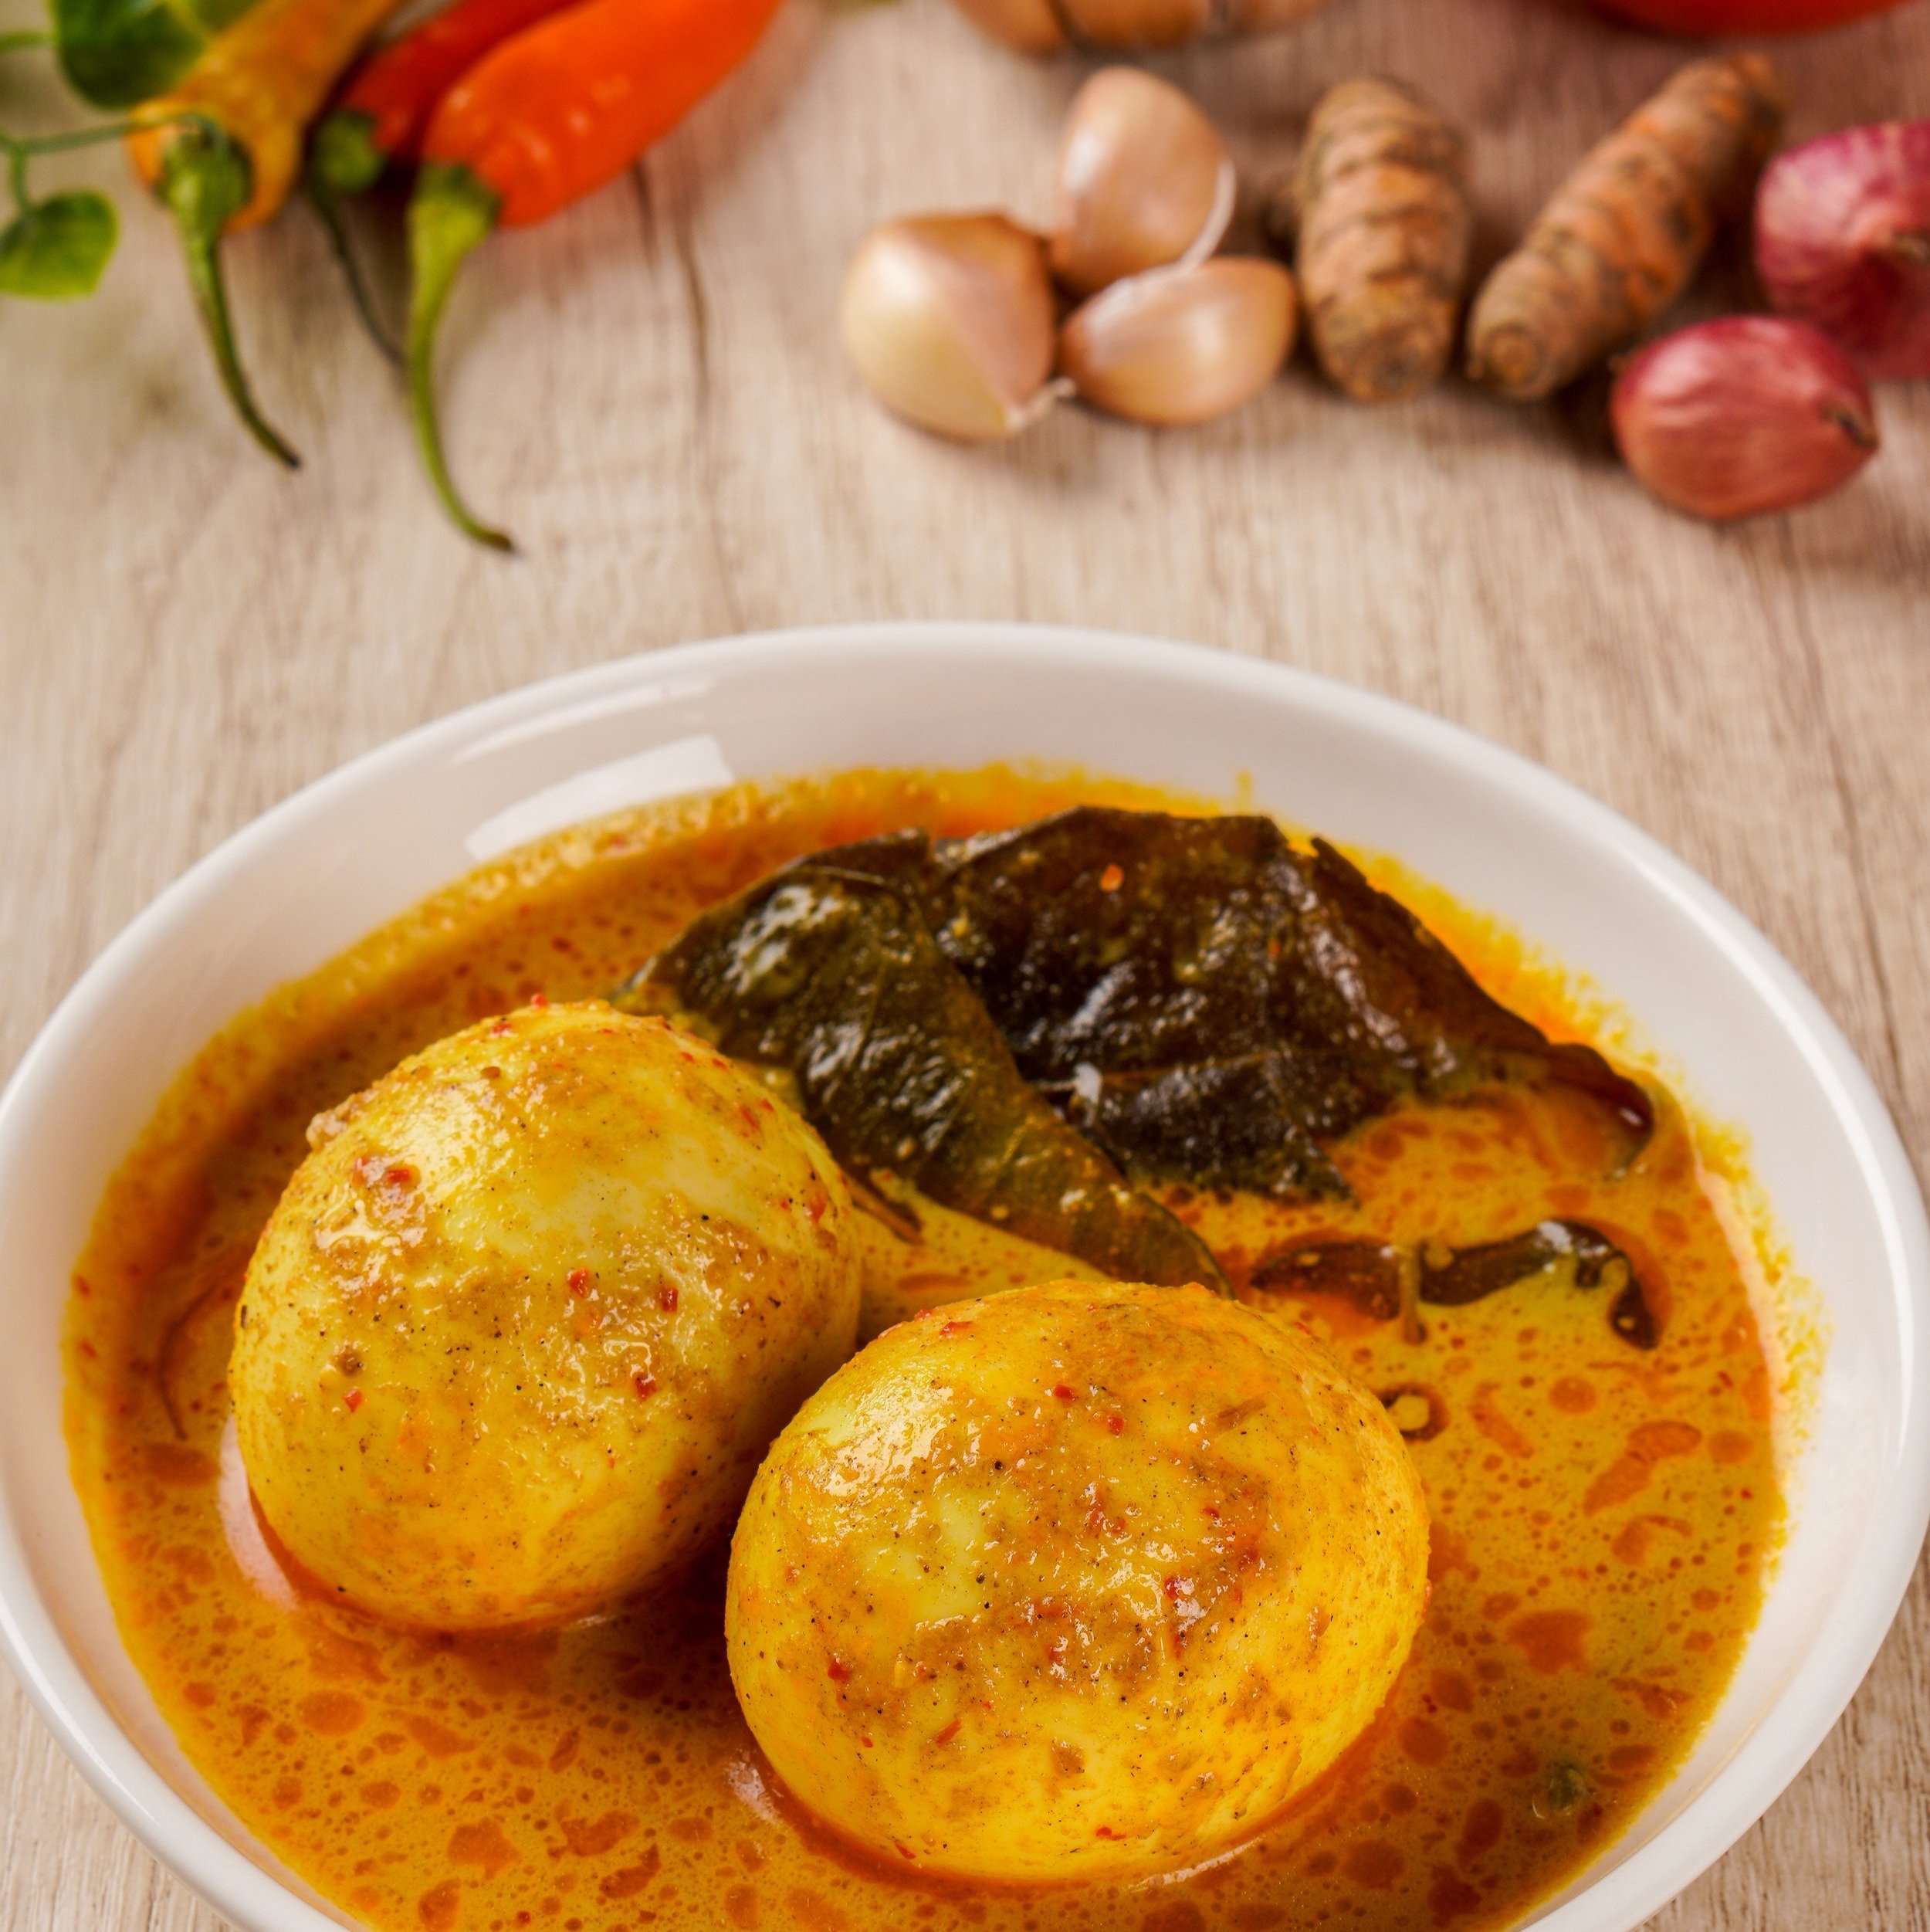
Padang Style Eggs
The rich sauce for these Indonesian eggs is aromatic and bright yellow. The trick is to cook the sauce and eggs separately. Add the eggs to the sauce before serving, allowing them to warm through.
Ingredients
8 eggs, soft boiled for 6 minutes
1 can coconut milk
1 lemongrass stick, bruised and tied in a knot
½ teaspoon sea salt
1 tablespoon tamarind paste
Bumbu Flavor Paste
1 bunch scallions, roughly chopped
4 garlic cloves, roughly chopped
2 inches ginger, peeled and roughly chopped
1 inch turmeric, peeled and roughly chopped
½ teaspoon red chili powder
Directions
Bring eggs up to a boil in cold water. Turn the heat off and time for 6 minutes. Run under cold water and peel. The yolks should be firm but creamy.
Grind the ingredients for the Bumbu in a high-speed blender. Adding a little of the coconut milk to help the blades turn.
Cook the Bumbu until its raw flavors have mellowed. Add the remaining coconut milk, lemongrass and salt. Stir and simmer for 10 minutes. Add the tamarind paste and taste, correcting the seasoning as needed.
When ready to serve, warm the sauce, then add the eggs to heat through gently.